Checking blood sugar at home is very important for diabetics or people who need blood glucose monitoring (Reference: Who needs blood glucose monitoring?). Thanks to advances in medical technology, people can easily check their blood glucose levels at home using a blood glucose meter. This article will explain how to check blood sugar at home using a blood glucose meter.
Understanding Blood Sugar Levels
Before delving into the significance of finger-stick blood glucose meters, it’s essential to comprehend the importance of monitoring blood sugar levels. Blood sugar, or blood glucose, refers to the concentration of sugar (glucose) present in our bloodstream. Glucose is the primary source of energy for our bodies and is obtained from the food we consume. However, excessive or inadequate levels of blood glucose can lead to health complications.
For individuals without diabetes, the body naturally regulates blood glucose levels. However, those with diabetes face challenges in maintaining proper glucose levels due to issues with insulin production or insulin resistance. High blood sugar levels (hyperglycemia) can cause complications like nerve damage, kidney problems, and cardiovascular issues. On the other hand, low blood sugar levels (hypoglycemia) can result in dizziness and confusion, and, if severe, may lead to unconsciousness.
About Finger-Stick Blood Glucose Meters
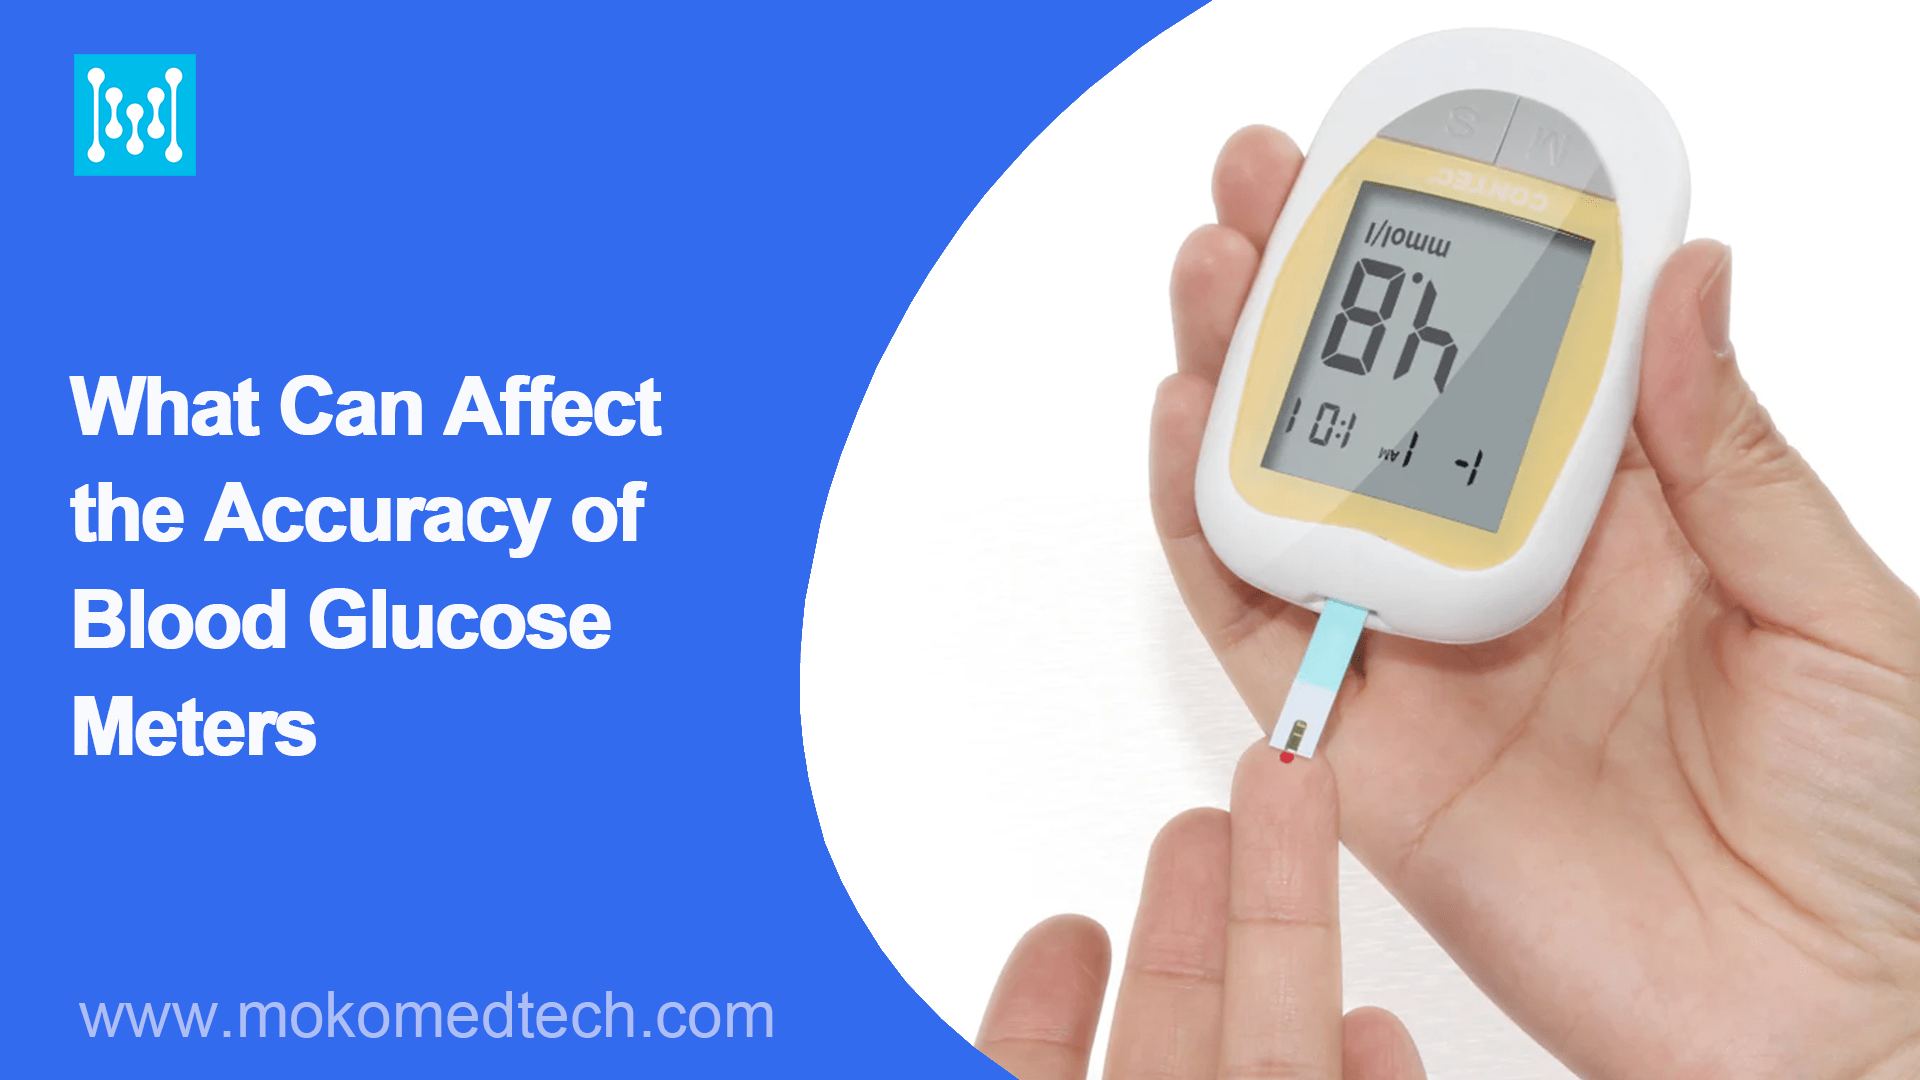
Finger-stick blood glucose meters, or glucometers, are handheld devices designed to measure blood sugar levels quickly and accurately. These portable devices have revolutionized diabetes management and enabled individuals to monitor their blood glucose levels conveniently at home.
The process of using a finger-stick blood glucose meter is relatively straightforward. It involves pricking the fingertip with a small lancet to obtain a tiny droplet of blood. The blood is then applied to a test strip inserted into the glucometer. The meter analyzes the blood sample and provides a digital readout of the blood glucose level within seconds.
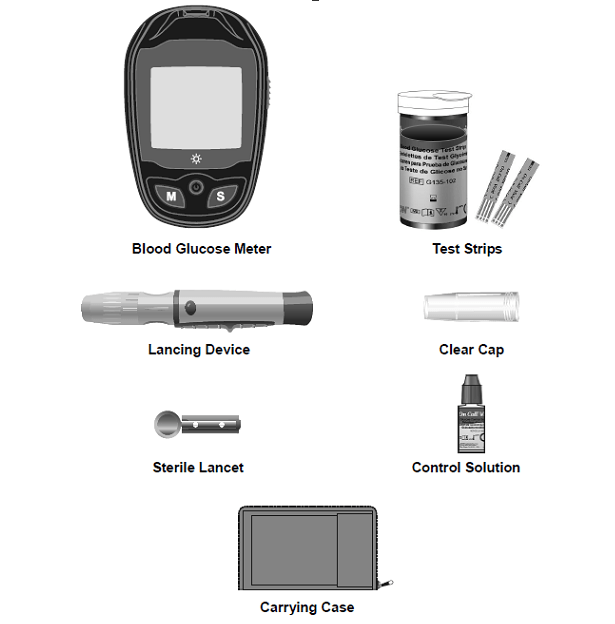
A finger-stick blood glucose meter typically consists of several key components that work together to measure and display a person’s blood glucose level. While the exact design and features may vary between different models and manufacturers, the fundamental components remain consistent. Here are the primary components of a standard finger-stick blood glucose meter.
Display Screen:
This is the user interface of the meter, typically an LCD (Liquid Crystal Display) screen. It shows the blood glucose reading, as well as other relevant information, such as time, date, and battery status.
Test Strips:
These are disposable strips made of plastic or paper that contain specific chemicals and enzymes. The user applies a drop of blood to the test strip, and the strip reacts with the blood to measure the glucose level.
Blood Sample Application Area:
This is a designated area on the test strip where the user places the drop of blood for testing. It may be a small channel or a specific spot that can attract and absorb the blood sample effectively.
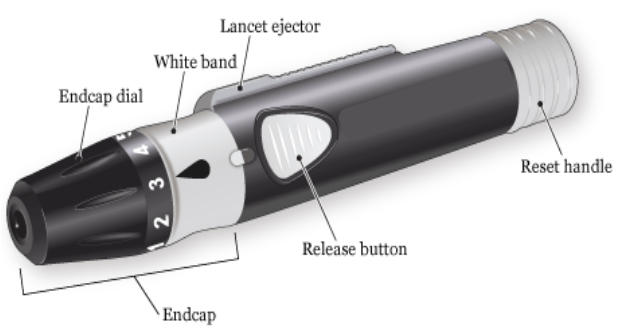
Lancing Device:
The lancing device is a small handheld tool used to prick the skin, usually the fingertip, to obtain a small drop of blood for testing. It typically contains a lancet, a fine, sterile needle that is spring-loaded or mechanically released to puncture the skin.
Control Buttons:
The meter may have a few buttons or touch-sensitive areas allowing the user to navigate through menus, set dates and times, and perform other basic functions.
Battery Compartment:
The meter is powered by batteries, which are usually housed in a compartment on the back or side of the device.
Data Storage:
Many modern meters come with internal memory to store previous blood glucose readings and sometimes other data, such as timestamps. Some meters can also transmit data to external devices like computers or smartphones.
On/Off Button or Auto-On Feature:
This button or feature activates the meter when pressed or automatically turns it on when a test strip is inserted.
Control Solution (Optional):
Some meters come with a control solution—a glucose solution of known concentration—that users can apply to the test strip to verify the meter’s accuracy.
Data Port (Optional):
Some meters have a data port or wireless capabilities to transfer data to external devices, such as computers or mobile apps, for further analysis and tracking.
Carrying Case:
Many glucose meters come with a protective carrying case to keep the meter and its components safe and easily portable.
User Manual:
An essential component that provides instructions for using the meter correctly and safely.
It’s important to note that while the core components are similar, specific features, design elements, and additional functionalities can vary depending on the manufacturer and model of the finger-stick blood glucose meter. Always refer to the user manual for detailed instructions on using a particular meter.
How to Check Blood Sugar At Home with A Blood Glucose Meter
Checking blood sugar at home using a finger stick blood glucose meter is a common and important practice for individuals with diabetes or other conditions that require monitoring blood sugar levels. Here’s a step-by-step guide on how to do it:
Materials Needed:
- Finger stick blood glucose meter (How to choose your blood glucose meter?)
- Test strips compatible with your meter
- Lancet device (to prick your finger)
- Lancets (tiny needles that go into the lancet device)
- Alcohol wipes or cotton balls and rubbing alcohol
- Pen and paper or a smartphone app to record results
Step-by-Step Guide:
- Wash Your Hands: Before starting, wash your hands with soap and water, and dry them thoroughly. This helps ensure accurate results and prevents contamination.
- Prepare the Meter: Insert a test strip into your glucose meter. Make sure it is properly seated and that the meter is ready to use.
- Prepare the Lancet Device: Load the lancet device with a new lancet. Follow the instructions provided with your lancet device to do this properly.
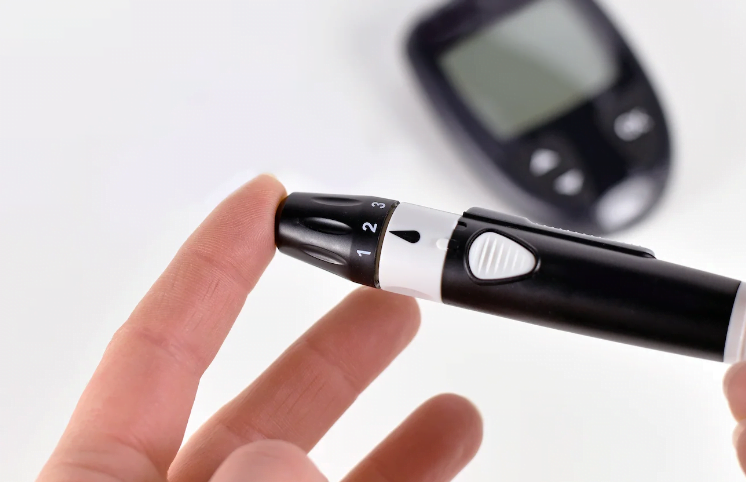
- Select a Finger: Decide which finger to use for the test. Typically, the side of the fingertip is used, but some meters allow testing on alternative sites like the forearm or palm. Check your meter’s instructions for approved testing sites.
- Clean the Area: Use an alcohol wipe or a cotton ball with rubbing alcohol to clean the chosen area. Let it dry completely before proceeding.
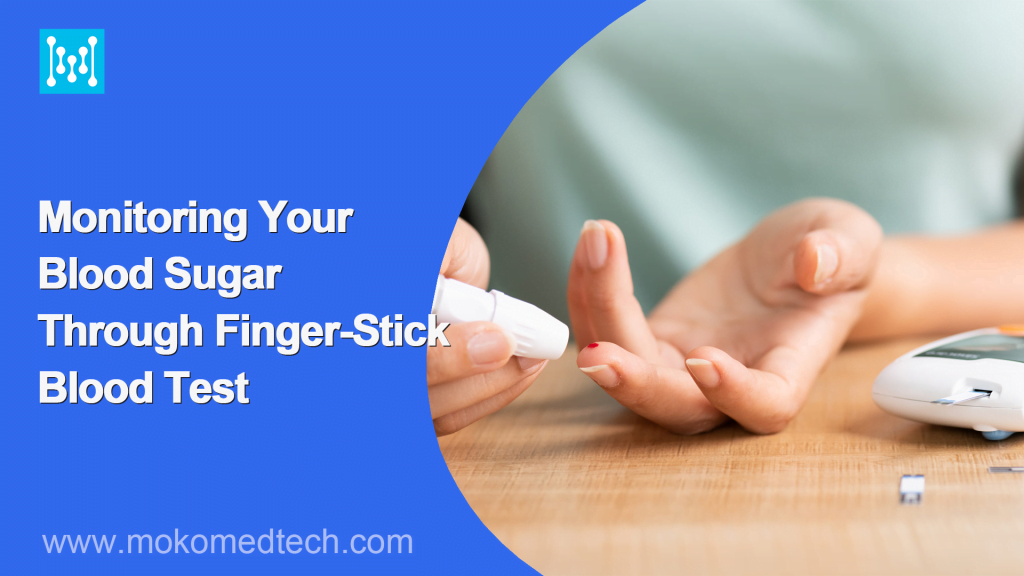
- Prick Your Finger: Hold the lancet device firmly against the clean area and press the release button. The lancet will quickly prick your skin, creating a small drop of blood.
- Collect the Blood: Touch the tip of the test strip to the drop of blood. The strip will automatically draw the blood into the meter for analysis. Ensure the meter displays a countdown or indicates that it’s processing the sample.
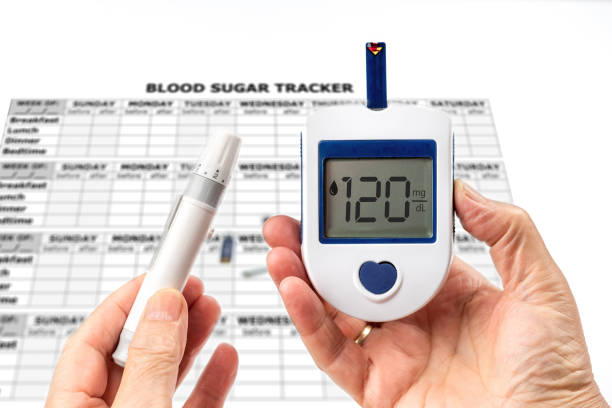
- Read the Results: After a few seconds, the meter will display your blood sugar level on the screen. Some meters also provide additional information, such as the date and time of the test.
- Record the Result: Note down the result in a logbook or a smartphone app. Keeping a record of your blood sugar levels will help you and your healthcare provider track patterns over time.
- Dispose of the Lancet and Test Strip: Safely dispose of the used lancet and test strip according to your local regulations for medical waste.
Tips for Accurate Results:
- Always use fresh lancets to minimize pain and ensure better blood flow.
- Do not squeeze the fingertip too hard to collect blood, as it can affect the accuracy of the reading.
- Make sure your test strips are not expired and are stored according to the manufacturer’s instructions.
- Keep your meter clean and follow the manufacturer’s guidelines for maintenance.
For more information about the accuracy of glucose meters>>
Benefits of Check Blood Sugar at Home
Home blood glucose monitoring with finger-stick meters offers several significant advantages:
Immediate Results: With a finger-stick blood glucose meter, individuals get real-time results, allowing them to make timely decisions about their diet, medication, or activities.
Improved Diabetes Management: Regular monitoring empowers individuals with diabetes to understand their body’s response to various factors like food, exercise, and medication. This knowledge is valuable for making informed choices to manage their condition effectively.
Early Detection of Abnormalities: Home monitoring allows individuals to identify trends and patterns in their blood sugar levels, enabling them to detect potential issues early and seek medical advice promptly.
Flexible Lifestyle: Home testing liberates individuals from the need to visit a clinic or laboratory for blood glucose tests, providing them with the flexibility to check their levels at any time and place.
Empowerment and Awareness: Monitoring at home encourages active participation in one’s health, fostering a sense of responsibility and awareness of the impact of lifestyle choices on blood sugar levels.
In Conclusion
The finger-stick blood glucose meter has become an indispensable tool in the daily lives of individuals living with diabetes. Its ease of use, portability, and ability to check blood sugar at home have empowered patients to take control of their health and make informed decisions. As technology continues to advance, we can expect these meters to become even more sophisticated, helping pave the way for better diabetes management and ultimately improving the quality of life for those affected by this chronic condition.
Through our unwavering dedication to quality, accuracy, and user-friendliness, MOKOMEDTECH has established itself as a trusted partner for leading healthcare brands seeking reliable and customizable blood glucose monitoring solutions. Our advanced manufacturing processes ensure that every blood glucose meter produced meets the highest industry standards, enabling users to monitor their blood sugar levels with confidence and ease.
MOKOMEDTECH remains dedicated to driving innovation and collaborating with our partners to develop even more sophisticated blood glucose monitoring solutions. Together, we can continue making a positive impact on diabetes management, supporting individuals in their journey toward a healthier and more empowered future.